Unlock Peak Productivity: The Ultimate Guide to Setting Up a Multi-Monitor Workstation
In today's fast-paced digital world, the ability to multitask efficiently is more crucial than ever. While a single monitor gets the job done, a multi-monitor workstation can genuinely revolutionize your workflow, boosting productivity and reducing mental fatigue. Imagine having your research open on one screen, your main project on another, and your communication tools on a third – no more endless alt-tabbing!
If you're ready to supercharge your setup, here's everything you need to know about setting up a multi-monitor workstation for maximum productivity.
Why Go Multi-Monitor? The Undeniable Benefits
Before we dive into the "how," let's quickly reinforce the "why":
- Increased Screen Real Estate: This is the most obvious benefit. More space means you can display more applications and information simultaneously.
- Streamlined Workflow: Keep relevant tools and documents visible without constantly minimizing and maximizing windows.
- Enhanced Multitasking: Easily reference data on one screen while working on another.
- Reduced Cognitive Load: Less switching between applications means your brain spends less effort remembering where things are, freeing up mental energy for the actual work.
- Improved Efficiency: Tasks that require comparing data or cross-referencing information become significantly faster.
Step 1: Assess Your Needs & Hardware Compatibility
Before buying anything, take stock of what you have and what you need:
-
Your Computer's Capabilities:
- Graphics Card (GPU): This is the heart of your multi-monitor setup. Check the back of your PC or laptop for available video output ports (HDMI, DisplayPort, DVI, VGA, USB-C/Thunderbolt). Modern GPUs typically support multiple displays.
- Processor (CPU) & RAM: While not as critical as the GPU for basic setups, having a decent CPU and ample RAM (16GB+ recommended) will ensure your system can handle multiple applications running across screens without lag.
-
Available Ports:
- Desktop PCs: Most desktop graphics cards will have 2-4 ports. High-end cards might have more.
- Laptops: Many modern laptops have at least one HDMI or DisplayPort, and often a USB-C port that supports video output (DisplayPort Alternate Mode or Thunderbolt). You might need a docking station or a USB-C hub for more outputs.
-
Monitor Selection:
- Matching Monitors: Ideally, use monitors of the same size, resolution, and refresh rate for a consistent visual experience. This reduces jarring transitions as you move your mouse between screens.
- Resolution: For productivity, 1080p (Full HD) is a good starting point, but 1440p (2K) or even 4K monitors offer significantly more screen real estate, especially useful for graphic designers, video editors, or data analysts.
- Panel Type: IPS panels offer better color accuracy and viewing angles, crucial for visual tasks.
- Bezel Size: Thinner bezels (the frame around the screen) make the transition between monitors smoother.
Step 2: Choose Your Connection Method & Cables
This is where compatibility comes into play. You'll need the right cables for your chosen ports:
- DisplayPort (DP): The preferred choice for multi-monitor setups. It supports high resolutions, refresh rates, and can even daisy-chain multiple monitors from a single port (if monitors support it).
- HDMI: Widely used and supports good resolutions. Common on most monitors and laptops.
- DVI: Older digital standard, still found on some monitors and GPUs.
- VGA: Analog standard, mostly obsolete for new setups due to lower quality. Avoid if possible.
- USB-C / Thunderbolt: Increasingly common on modern laptops. These versatile ports can carry video signals, often requiring a USB-C to DisplayPort/HDMI adapter or a docking station.
- Docking Stations/Hubs: Essential for many laptops that lack multiple video outputs. These devices connect via a single USB-C or Thunderbolt cable and provide multiple video outputs, USB ports, and often power delivery.
Important: Always use high-quality cables. Cheap cables can lead to flickering, resolution limitations, or no signal at all.
Step 3: Physical Setup – Placement is Key
Once you have your hardware, it's time to arrange your screens:
- Ergonomics First: Your primary monitor should be directly in front of you at arm's length, with the top of the screen at or slightly below eye level.
-
Placement Strategy:
- Two Monitors: Place your primary monitor centered, and the secondary one directly to its left or right. Alternatively, center the seam between the two monitors if you're frequently switching between them equally.
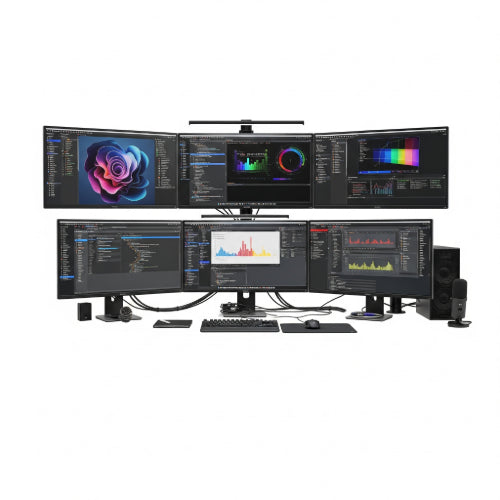
- Three Monitors: Center your main monitor directly in front of you, with the other two flanking it on either side. Angle the side monitors slightly inward for a more immersive experience.
- Vertical vs. Horizontal: For tasks like coding, writing, or reading long documents, consider orienting a secondary monitor vertically (portrait mode). This allows you to see more lines of code or text without scrolling.
- Monitor Arms (Highly Recommended): Investing in a good monitor arm (single, dual, or triple) provides immense flexibility. They free up desk space, allow for precise height and angle adjustments, and make it easy to switch between horizontal and vertical orientations.
Step 4: Configure Your Operating System
With the monitors physically connected, your operating system needs to be told what to do:
-
Windows (Settings > System > Display):
- Right-click on your desktop and select "Display settings."
- Windows should automatically detect your monitors. If not, click "Detect."
- Arrange your displays: Drag and drop the numbered monitor icons to match their physical arrangement on your desk. This is crucial for smooth mouse movement.
-
Multiple displays setting:
- "Extend these displays" (Recommended): This gives you maximum screen real estate, allowing you to drag windows between monitors.
- "Duplicate these displays": Shows the same content on all screens (useful for presentations, but not productivity).
- "Show only 1/2/3/4": Disables other monitors.
- Resolution: Set each monitor to its native resolution for the sharpest image.
- Orientation: Change a monitor's orientation to "Portrait" if you've physically rotated it.
-
macOS (System Settings > Displays):
- Go to System Settings (or System Preferences) > Displays.
- The "Arrangement" tab allows you to drag and drop monitor icons to match your physical setup.
- You can also choose the "primary" display (the one with the menu bar).
- Set resolution and rotation for each display.
Step 5: Optimize for Productivity
Now that your monitors are set up, fine-tune them for maximum efficiency:
- Wallpaper: Consider a spanning wallpaper or a different background for each screen to make it visually distinct.
-
Taskbar/Dock:
- Windows: Right-click the taskbar, go to "Taskbar settings," and under "Multiple displays," choose whether to show the taskbar on all displays or just the main one, and how icons appear.
- macOS: The Dock usually appears on the primary display. You can move it by dragging your mouse to the bottom of the desired screen.
-
Window Management Software: Third-party tools can vastly improve window snapping and organization:
- Windows: PowerToys FancyZones (Microsoft) is excellent for creating custom snap zones.
- macOS: Rectangle (free), Magnet, or BetterSnapTool offer similar window snapping features.
- Keyboard Shortcuts: Learn shortcuts for moving windows between screens (e.g., Windows Key + Shift + Left/Right Arrow).
- Mouse Speed/Acceleration: Adjust your mouse sensitivity to comfortably traverse multiple screens.
-
Application Placement Strategy:
- Main Work: Keep your primary application (e.g., coding IDE, word processor) on your central or main monitor.
- Reference/Communication: Use side monitors for email, chat applications, research documents, reference materials, or dashboards.
- Vertical Monitor: Ideal for long documents, code, or social media feeds.
Troubleshooting Tips
- No Signal: Double-check all cable connections. Ensure your graphics drivers are up to date. Try restarting your computer.
- Resolution Issues: Make sure each monitor is set to its native resolution in your OS display settings.
- Flickering: Try different cables, update graphics drivers, or reduce the refresh rate slightly.
- Lagging: Ensure your system meets the minimum requirements, close unnecessary background applications, or upgrade RAM/GPU if needed.
Conclusion
A multi-monitor workstation is more than just a tech upgrade; it's an investment in your personal efficiency and comfort. By strategically choosing your hardware, arranging your setup ergonomically, and leveraging software optimization, you can create a workspace that allows you to see more, do more, and ultimately, achieve maximum productivity. So, go ahead, embrace the extra screen real estate – your future productive self will thank you!