Lights Out, Magic On: Your Guide to Setting Up the Perfect Home Theater with a Projector
Dreaming of a cinematic experience right in your living room? Forget squinting at a small TV screen – a projector can transform your space into a true home theater, offering immersive visuals that rival the big screen. But setting up a projector-based home theater can seem daunting. Fear not, fellow cinephiles! This guide will walk you through the steps to create your perfect home theater oasis.
Phase 1: Planning Your Cinematic Sanctuary
Before you even think about unboxing your projector, careful planning is key.
- The Space: Consider the size and layout of your room. How large is the wall you'll be projecting onto? Can you control ambient light effectively? Darker rooms are generally better for projector viewing. Think about seating arrangements and viewing distance.
- Screen Size and Throw Distance: This is crucial. Projectors have a "throw ratio" which determines the screen size you can achieve at a specific distance. Use an online projector throw distance calculator (most manufacturers offer these on their websites) to determine the ideal projector placement for your desired screen size.
- Sound System: Don't underestimate the importance of audio! While some projectors have built-in speakers, they rarely deliver a truly immersive experience. Plan for a dedicated sound system, whether it's a soundbar, a 2.1 setup, or a full surround sound system (5.1, 7.1, or even Atmos).
- Connectivity: Consider all the devices you'll want to connect – Blu-ray players, streaming devices, gaming consoles, etc. Ensure your projector and receiver (if using one) have enough HDMI ports.
- Budget: Home theater setups can range from budget-friendly to high-end. Determine your budget early on to guide your equipment choices.
Phase 2: Gathering Your Gear
Now for the fun part – acquiring your equipment!
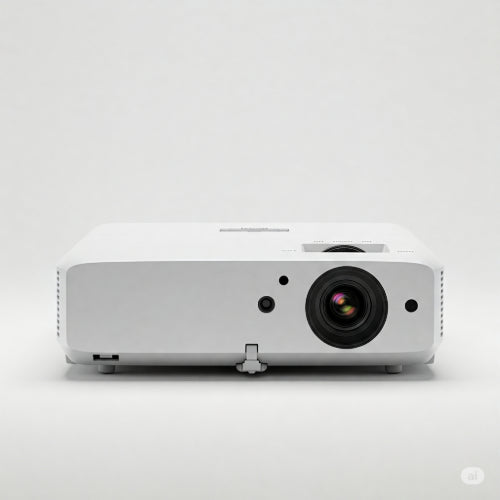
- The Projector: Research different types (LCD, DLP, Laser) and resolutions (HD, Full HD, 4K). Consider brightness (lumens), contrast ratio, and features like keystone correction and lens shift. Read reviews and compare specifications to find the best projector for your needs and budget.
- The Screen (Optional but Recommended): While you can project onto a blank wall, a dedicated projector screen offers a smoother, more uniform surface for better image quality, contrast, and brightness. Choose a screen size that fits your space and viewing distance. Consider fixed-frame, pull-down, or motorized screens.
- Sound System: Select a sound system that complements your visual setup. A soundbar is a simple solution, while a dedicated surround sound system offers a more immersive experience. Don't forget speaker wires and potentially a receiver/amplifier.
- Mounting Solutions: You'll need a way to securely mount your projector. Ceiling mounts are common for a permanent setup, while tabletop tripods offer more flexibility. Ensure your mount is compatible with your projector.
- Cables: Invest in high-quality HDMI cables to ensure optimal video and audio transmission. Consider longer cables if your projector and source devices are far apart. You might also need optical or RCA cables for audio.
- Power Strips and Surge Protectors: Protect your valuable equipment from power surges.
Phase 3: Setting Up Your Home Theater
Time to bring your vision to life!
- Mount the Projector: Carefully follow the manufacturer's instructions for your chosen mount. Ensure it's securely fastened and positioned correctly based on your throw distance calculations.
- Install the Screen (If Using): Mount your screen according to its instructions, ensuring it's level and at the desired height. Consider the viewing angles from your seating positions.
- Connect Your Devices: Connect your source devices (Blu-ray player, streaming stick, etc.) to the projector's HDMI inputs. If you're using a separate sound system, connect the projector's audio output (HDMI ARC, optical, or analog) to your receiver or soundbar.
- Position Your Speakers: Arrange your speakers according to your chosen sound system configuration. For surround sound, proper placement is crucial for an immersive experience.
- Power Everything On: Plug in all your devices and turn them on.
- Initial Projector Setup: Navigate the projector's menu to adjust basic settings like language, input source, and Wi-Fi connection (if applicable).
- Focus and Keystone Correction: Use the projector's focus ring or motorized focus to achieve a sharp image. If the image is trapezoidal instead of rectangular, use the keystone correction feature to square it up. Be mindful that excessive keystone correction can sometimes distort the image. Lens shift (if your projector has it) is a better way to adjust the image without distortion.
- Screen Alignment: Fine-tune the projector's position or use lens shift to perfectly align the projected image with your screen.
- Sound System Setup: Configure your sound system, ensuring all speakers are working correctly and the audio is synced with the video.
- Calibration (Optional but Recommended): For the best possible picture quality, consider calibrating your projector. You can use built-in calibration tools, purchase calibration software, or hire a professional calibrator. This involves adjusting settings like brightness, contrast, color, and sharpness.
Phase 4: Fine-Tuning and Enjoying Your Creation
Congratulations! You've set up your home theater. Now it's time to fine-tune and enjoy the magic.
- Ambient Light Control: Experiment with curtains, blinds, or blackout curtains to minimize ambient light during viewing.
- Seating Arrangement: Ensure your seating provides comfortable viewing angles for everyone.
- Cable Management: Tidy up any loose cables for a cleaner and safer setup. Consider using cable sleeves or raceways.
- Remote Control Harmony: Invest in a universal remote to control all your devices with ease.
- Regular Maintenance: Clean your projector's lens regularly according to the manufacturer's instructions to maintain image clarity.
Setting up a home theater with a projector takes some effort, but the reward is an immersive cinematic experience you can enjoy anytime. With careful planning and the right equipment, you can transform your living room into your very own private cinema. So grab your popcorn, dim the lights, and get ready for movie night!