How to Set Up and Use Your Receipt Printer for Retail
In the fast-paced world of retail, efficiency is key. Every second counts, and a smooth, reliable point-of-sale (POS) system is the backbone of any successful business. A crucial component of this system is your receipt printer. While it might seem like a minor detail, a properly set up and functioning receipt printer ensures quick transactions, accurate records, and a professional image for your store.
This guide will walk you through the process of setting up and using your receipt printer for retail, ensuring you're ready to print those essential receipts in no time.
Choosing the Right Receipt Printer
Before diving into setup, ensure you have the right printer for your needs. The two most common types are:
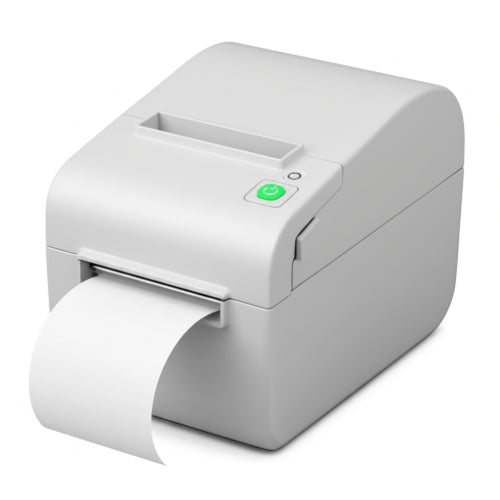
- Thermal Printers: These are the most popular for retail due to their speed, quiet operation, and ink-free printing (they use heat-sensitive paper).
- Impact (Dot Matrix) Printers: While slower and noisier, these are still used in some environments, especially where duplicate copies (like for kitchen orders) are needed, as they use ink ribbons.
Consider your POS software compatibility, connectivity options (USB, Ethernet, Bluetooth, Wi-Fi), and durability when making your choice.
Setting Up Your Receipt Printer: A Step-by-Step Guide
While specific steps might vary slightly depending on your printer model and POS system, the general process remains consistent.
Step 1: Unboxing and Physical Connections
- Unbox the Printer: Carefully remove the printer, power adapter, USB cable (if applicable), and any included accessories from the packaging.
-
Load the Receipt Paper:
- Open the paper cover (usually by pressing a latch or lifting a lever).
- Insert the roll of thermal paper, ensuring the leading edge feeds out from the bottom and the roll spins counter-clockwise when pulled.
- Close the cover firmly. Leave a small tail of paper sticking out.
- Connect the Power: Plug one end of the power adapter into the printer's power port and the other into a reliable power outlet.
-
Connect to Your POS System (Choose one):
- USB: Connect the USB cable from the printer to an available USB port on your POS computer or tablet.
- Ethernet (Network): Connect an Ethernet cable from the printer's LAN port to your network router or switch. This is ideal for multiple POS stations.
- Bluetooth/Wi-Fi: If your printer supports wireless connectivity, follow the manufacturer's instructions to pair it with your POS device or connect it to your Wi-Fi network.
Step 2: Driver Installation (for USB or sometimes network printers)
For USB printers, you'll almost always need to install drivers. For network printers, sometimes drivers are needed, especially if your POS software requires a specific integration.
- Locate Drivers: Most printers come with a driver CD, or you can download them directly from the manufacturer's website. Search for "[Printer Model] drivers."
- Install Drivers: Run the installer. Follow the on-screen prompts, which usually involve accepting terms, choosing an installation location, and restarting your computer if requested.
Step 3: Configuring the Printer in Your POS Software
This is where you tell your POS system to "talk" to your receipt printer.
- Access POS Settings: Open your POS software and navigate to the settings or hardware configuration section. This is often labeled "Printers," "Hardware," "Peripherals," or "Devices."
-
Add/Select Printer:
- For USB Printers: Your POS system might automatically detect the printer after driver installation. If not, look for an option to "Add Printer" or "Search for Devices." Select your printer from the list of available devices.
- For Ethernet/Network Printers: You'll typically need to enter the printer's IP address. You can usually find the IP address by printing a test page from the printer itself (refer to your printer's manual for instructions on how to do this, often by holding a button while powering on).
- For Bluetooth/Wi-Fi Printers: Ensure the printer is paired/connected, and then select it from the list of available devices in your POS software.
- Set as Default: Designate your receipt printer as the default printer for sales receipts.
- Test Print: Most POS systems have a "Test Print" button. Click it to confirm everything is working correctly. A successful test print means you're almost there!
Using Your Receipt Printer Effectively
Once set up, here are some tips for optimal use:
- Load Paper Correctly: Always ensure the paper roll is inserted correctly and spins freely. Incorrect loading is a common cause of jams.
- Use the Right Paper: Only use thermal paper for thermal printers. Regular paper won't work. Check your printer's specifications for the correct paper width and roll diameter.
- Keep it Clean: Dust and debris can affect print quality. Regularly clean the thermal print head with an alcohol wipe (when the printer is off and cool).
- Regular Maintenance: Follow your printer manufacturer's recommendations for any other maintenance.
-
Troubleshooting Basics:
- No Power: Check power connections and the outlet.
- No Print: Ensure paper is loaded, drivers are installed, and the printer is selected in your POS software. Check for paper jams.
- Faded Print: Paper might be loaded backward, or the thermal head might be dirty or failing.
- Connectivity Issues: For network printers, check your network cables and router. For Bluetooth, ensure it's paired and within range.
Conclusion
Setting up and using your receipt printer for retail is a straightforward process that lays the groundwork for efficient transactions. By following these steps and incorporating good practices, you'll ensure your POS system runs smoothly, keeping your customers happy and your business thriving. Happy printing!