Hearing is Believing: Troubleshooting Audio Issues in Your Office Sound System
Few things disrupt a meeting, presentation, or office event faster than a malfunctioning sound system. Crackling microphones, distorted audio, or complete silence can turn a professional gathering into a frustrating exercise in "Can you hear me now?" When your office sound system starts acting up, it can be a puzzle to solve.
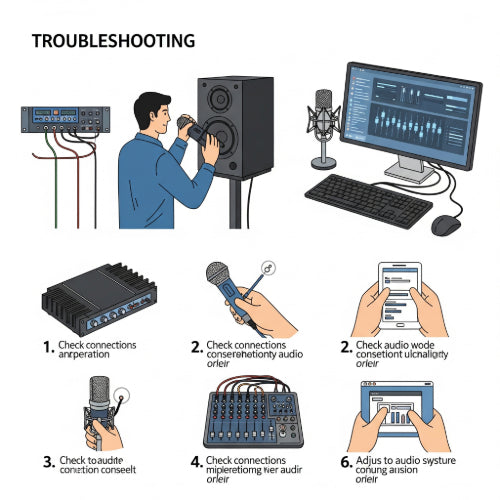
But don't despair! Most audio issues can be tracked down with a systematic approach. Before you call in an expensive AV technician, here's a guide to common office sound system problems and how to troubleshoot them, helping you get back to crystal-clear communication.
1. The Dreaded Silence: No Sound at All
The most frustrating scenario: everything seems on, but you hear absolutely nothing.
Possible Causes:
-
Power Off/Unplugged: The obvious first check.
-
Volume Muted or Too Low: Simple oversight.
-
Incorrect Input/Output Selection: The mixer or amplifier isn't listening to the right source, or sending to the right speakers.
-
Loose/Damaged Cables: Cables connecting components are disconnected or faulty.
-
Source Device Issues: The computer, microphone, or media player isn't sending audio.
-
Speaker Failure: Less common, but possible.
How to Resolve:
-
Check All Power: Ensure every component (mixer, amplifier, speakers, microphones) is plugged in and powered on. Look for indicator lights.
-
Verify Volume Levels: Check master volume on the mixer/amplifier, individual channel volumes, and the volume on the source device (e.g., computer's sound settings). Ensure nothing is muted.
-
Confirm Input/Output Routing: On your mixer or audio interface, make sure the correct input channel is selected for your source (e.g., the microphone is plugged into channel 1 and channel 1's fader is up). Ensure the main output is routed to the amplifier/speakers.
-
Inspect and Reseat All Cables: Unplug and firmly re-plug all audio cables (XLR, TRS, RCA, speaker wire). Try swapping cables if you have spares to rule out a faulty one.
-
Test Source Device Independently: Connect your computer or media player directly to a known working speaker or headphones to confirm it's outputting audio.
-
Check Speaker Connections: Ensure speaker wires are correctly connected to both the amplifier and the speakers (positive to positive, negative to negative). If possible, try a different speaker.
2. The Unwanted Noises: Hums, Hisses, and Buzzes
Your system is making sound, but it's accompanied by irritating background noise.
Possible Causes:
-
Ground Loop Issues: The most common cause of hums, often due to different components being plugged into different electrical outlets or having varying ground potentials.
-
Poorly Shielded Cables: Cheap or damaged cables can pick up electromagnetic interference.
-
Interference from Other Electronics: Phones, fluorescent lights, or unshielded power cables too close to audio cables.
-
Gain Staging Issues: Input levels are too high on a mixer or microphone, introducing hiss.
-
Faulty Equipment: A component itself might be failing.
How to Resolve:
-
Isolate Power Sources: Try plugging all audio components (mixer, amp, source) into the same power strip or outlet. This often resolves ground loops. Ground loop isolators can also be purchased.
-
Use Balanced Cables (XLR/TRS): Whenever possible, use balanced cables (XLR or 1/4" TRS) for microphones and line-level signals, as they are much more resistant to interference than unbalanced RCA or TS cables.
-
Route Cables Smartly: Keep audio cables away from power cables, fluorescent lights, and large electrical appliances.
-
Adjust Gain Staging: On your mixer, ensure microphone and line-level input gains are set correctly – high enough for a good signal, but not so high that they peak or introduce hiss. Use the "PFL" or "Solo" button on mixer channels to monitor individual input levels.
-
Test Components Individually: Disconnect components one by one to see when the noise disappears. This helps pinpoint the source.
3. Warped Words: Distortion and Clipping
The audio is loud, but it sounds fuzzy, crackly, or unintelligible.
Possible Causes:
-
Overdriven Inputs/Outputs (Clipping): Sending too hot a signal into a component, causing it to "clip" or distort. This is indicated by red "peak" or "clip" lights on mixers and amplifiers.
-
Faulty Microphone: A damaged microphone element.
-
Damaged Speaker: A blown speaker cone.
-
Incorrect Impedance Matching: Speakers connected to an amplifier with incorrect impedance.
How to Resolve:
-
Reduce Gain Levels: Lower the gain on microphone inputs, channel faders, and the master output on your mixer. Ensure no red "peak" lights are consistently on.
-
Check Amplifier Gain: Ensure the amplifier's input gain isn't set too high, causing it to clip prematurely.
-
Test Microphone: Try a different microphone to see if the issue persists. If not, the original mic might be faulty.
-
Inspect Speakers: Listen closely to each speaker. If one sounds distorted even at low volumes, its components might be damaged.
-
Verify Impedance (Advanced): Ensure your speakers' impedance (e.g., 8 ohms) matches or is compatible with your amplifier's output impedance. Incorrect matching can damage the amplifier or speakers.
4. Intermittent Audio: Dropouts and Fades
Sound comes and goes, or mysteriously fades in and out.
Possible Causes:
-
Loose Connections: Cables that are barely connected can cause intermittent signal.
-
Interference (Wireless Systems): Competing wireless signals or low battery in wireless microphones/transmitters.
-
Overheating Equipment: Amplifier or mixer components can degrade performance when hot.
-
Software Glitches (Computer Source): Sound drivers crashing or conflicting.
How to Resolve:
-
Reseat All Cables (Again!): This is a primary culprit for intermittent issues.
-
Wireless System Checks:
-
Battery Levels: Replace batteries in wireless microphones and receivers.
-
Frequency Scan: Many wireless systems allow you to scan for clear frequencies.
-
Antenna Placement: Ensure antennas are unobstructed and properly positioned.
-
Line of Sight: Maintain clear line of sight between transmitters and receivers.
-
-
Check Ventilation: Ensure all audio equipment has adequate airflow and isn't overheating.
-
Update Drivers/Software: For computer-based audio, ensure sound drivers and operating system are up to date.
Proactive Maintenance for a Smooth Sound System
-
Regular Cable Checks: Periodically inspect all cables for wear and tear.
-
Clean Connections: Dust can build up on connectors. Use compressed air or contact cleaner.
-
Battery Management: Always have spare batteries for wireless microphones.
-
Organized Cabling: Use cable ties and labels to keep your setup neat, preventing accidental disconnects and making troubleshooting easier.
-
Test Before Events: Always run a full system test before any important meeting or presentation.
-
Familiarize Yourself with Controls: Understand the basics of your mixer and amplifier settings (gain, faders, main output).
By taking a calm, systematic approach, you can conquer most audio issues in your office sound system. A little troubleshooting know-how can save you time, money, and the awkward silence of a malfunctioning microphone.